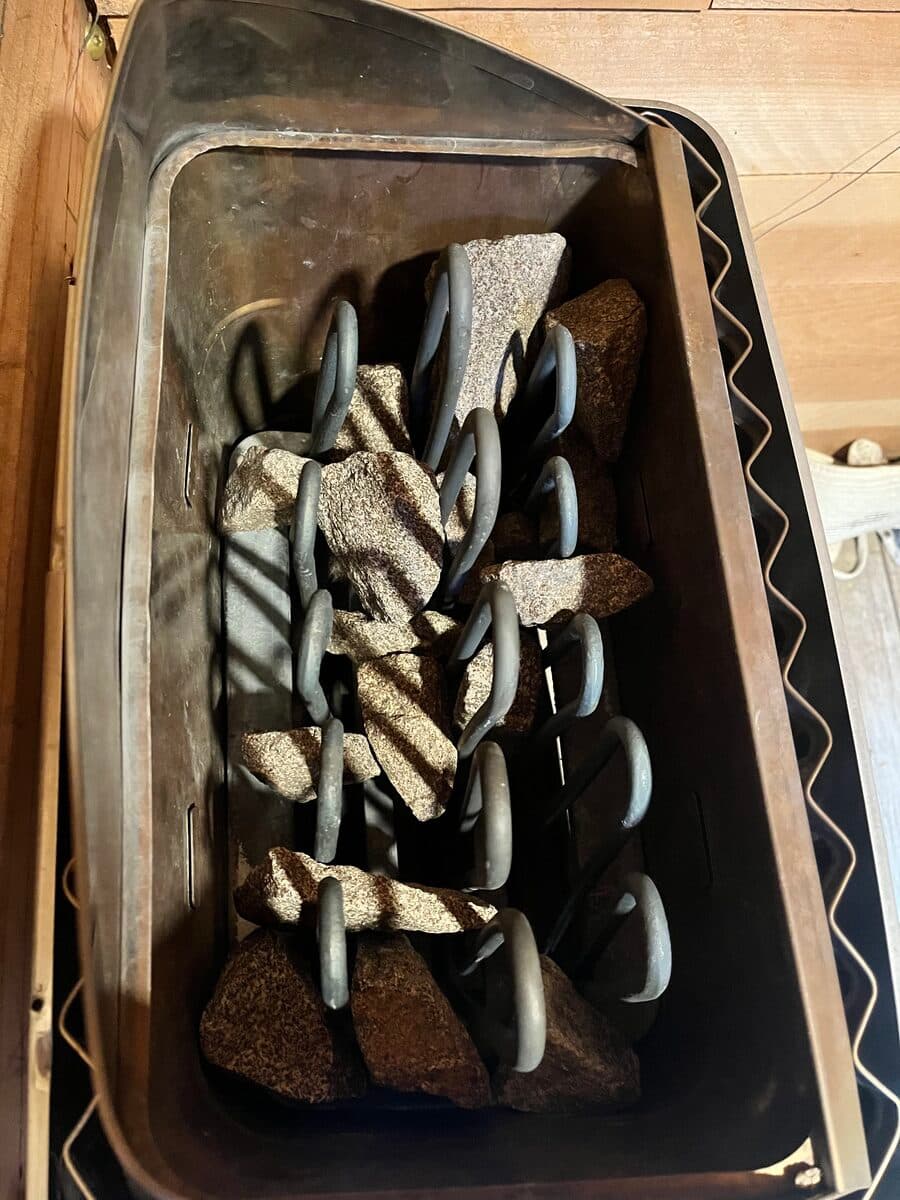
How to Load & Stack Sauna Rocks in an Electric Heater
The rocks in an electric sauna heater aren't decoration and they aren't optional — they're the part that actually stores and radiates the heat, and the part that turns a ladle of water into soft steam. How you load them changes how fast your sauna heats, how good the löyly feels, and how long your heating elements last. It's a five-minute job, but there's a right way and a wrong way, and most of the bad advice online gets one key detail backwards.
Here's how we load a heater on our own builds.
Wash the rocks before they ever go in
New sauna stones ship with dust and fine grit from cutting and tumbling. Before you load a single one, rinse them under water and let them drain. Skipping this is why a brand-new sauna often smells "off" or throws a little haze on the first few sessions — that's dust burning off. A quick rinse gets rid of most of it. (Even after washing, it's normal to get some smell on the first burn — which is why you should run a new sauna once or twice empty before using it.)
While you're handling them, sort out any stones that are cracked, flaking, or crumbling. Those go in the discard pile, not the heater.
Use the right rocks — igneous, rough, fist-sized
Not any rock works. Sauna stones need to survive being heated to several hundred degrees and then hit with cold water, over and over, without shattering. That means dense, non-porous igneous rock — peridotite, olivine, and vulcanite are the classics sold as sauna stones. Never use river rocks, granite scraps, or anything you found outside: trapped moisture inside a porous stone turns to steam when heated and the rock can crack or pop.
Size matters too. For most residential heaters you want stones roughly fist-sized, 2 to 5 inches. Bigger stones go toward the bottom and center where they store the most heat; smaller ones fill the gaps up top. Rough, split-faced rock is better than smooth, rounded rock — more surface area means faster, better steam.
Trusted by homeowners across Tahoe and beyond
The part everyone gets backwards: stack tightly between the elements
Here's where most guides steer you wrong. The common advice is to stack rocks "loosely" with big air gaps. On our builds, we do the opposite where it counts: pack the stones snugly into the spaces between the heating elements so the rocks hold the elements in position and hold each other in place.
The reason is the single most important rule of loading a heater:
Never let two heating elements touch each other.
The elements are what fail on an electric heater, and the fastest way to kill one is to let it rest against its neighbor. When metal touches metal, that contact point runs hotter than the rest of the element and burns out early. The rocks are what keep the elements apart — they act as spacers. So you want enough rock, packed firmly enough between the elements, that the elements stay separated and can't get pushed together as the stones settle over time.
That's a different goal than "cram every gap shut" and different from "stack them loose and airy." Think of it as: snug between the elements, elements never touching, stones fully covering the elements.
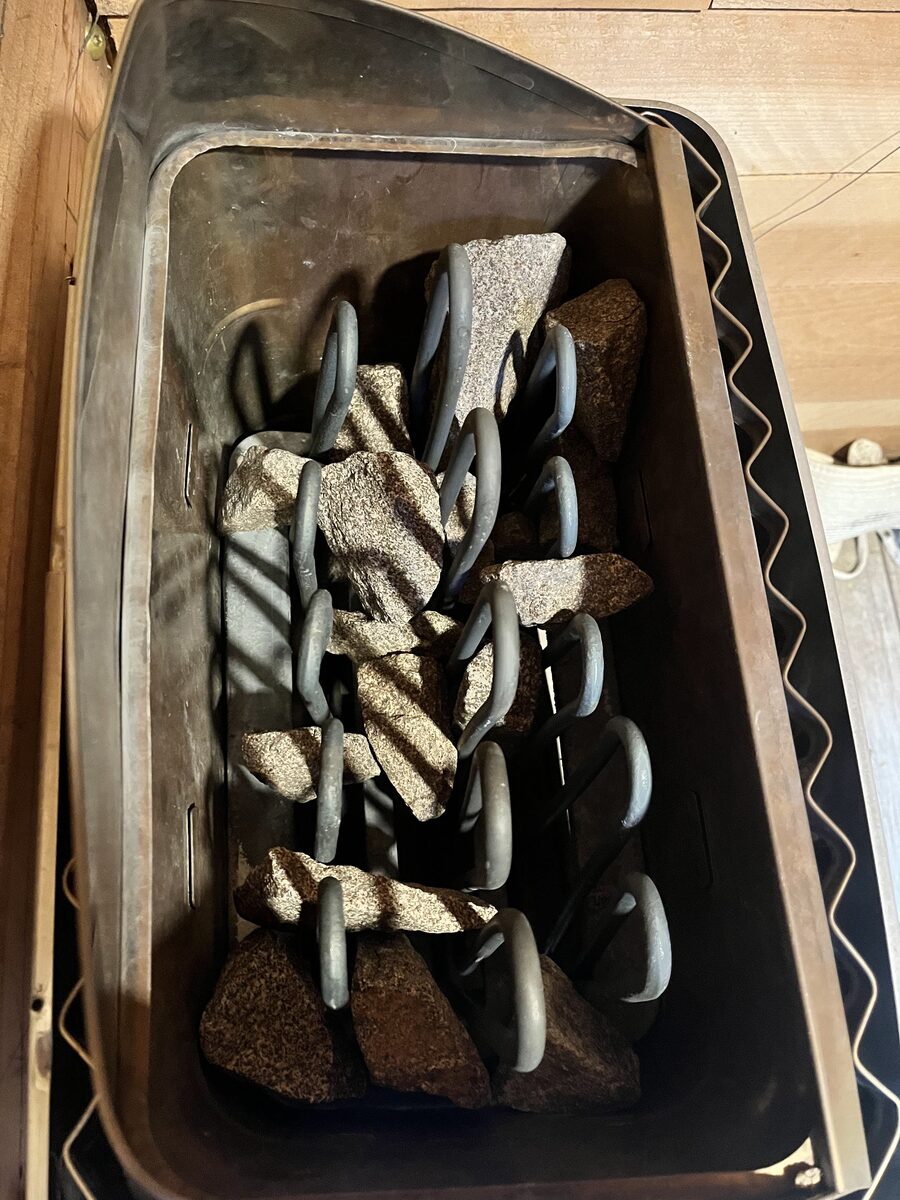
Cover the elements completely
When you're done, you shouldn't be able to see the heating elements — they should be buried in rock. Exposed, glowing elements are a problem for two reasons: they throw harsh radiant heat instead of the even warmth stones give off, and if you throw water and it hits a bare element directly, it can damage it. If an element becomes visible as the stones settle over the months, pull the top stones off and restack to cover it again.
Load the heater to the fill line the manufacturer marks (or to the top of the element cage). Don't heap rocks in a mound way above the heater — that just wastes stone and traps heat where it does nothing.
Keep your spare rocks
Quality heaters ship with about 5–10% more stone than you strictly need. Don't throw the extras away. Sauna stones slowly break down from thousands of heat-and-cool cycles — they crack, crumble, and shed grit — so every few months you'll want to restack and pull out the ones that are falling apart, topping up from your spares. A bag of spare stones in the closet saves you a re-order down the road.
How often to redo it
Restack and inspect the rocks every few months, and give them a full going-over once a year: remove everything, discard the crumbled stones, and reload from scratch (washing the keepers again). It takes ten minutes and it's the difference between a heater that steams beautifully for a decade and one that slowly chokes on its own dust.
Frequently Asked Questions
Should sauna rocks be stacked tightly or loosely?
Stack them snugly in the spaces between the heating elements — tight enough that the rocks hold the elements apart and can't shift and let two elements touch. That last point is the real goal: elements touching each other is what burns them out. So "tight between the elements, with the elements always separated and fully covered" is the target, not a loose, airy pile.
How many rocks does an electric sauna heater need?
Enough to completely fill the element cage up to the manufacturer's fill line and fully cover the elements — for a typical residential heater that's usually 30 to 50 lbs of stone, but go by the fill line on your specific model, not a weight. Running a heater with too few rocks lets the elements run exposed and overheat.
Can I use regular rocks in a sauna?
No. Use only proper sauna stones — dense igneous rock like peridotite, olivine, or vulcanite. Porous rocks (river rock, sandstone, granite offcuts) can trap water, and when heated that water flashes to steam and the rock can crack or pop. Sauna stones are cheap; it's not worth the risk.
How often should I replace sauna rocks?
Inspect them every few months and replace crumbling stones as needed — most home saunas need a partial top-up yearly and a fuller replacement every few years. Keep the 5–10% spare stones your heater came with for exactly this.
Why does my new sauna smell when I first heat it?
Mostly dust on new stones and manufacturing residue on new elements and wood burning off. Rinse the rocks before loading, then run the sauna empty once or twice before your first real session and the smell clears.
Next steps
Loading the rocks is one small part of owning a sauna well. For the whole picture — heat-up times, the temperature sensor, fresh-air setup, essential oils, and keeping the wood and floor in good shape — grab our free Sauna Owner's Guide; it's the same guide we hand our clients on day one. If you ever find your heater running but not reaching temperature, that's usually a burned-out element, and if it never got hot enough to begin with, the cause is often in the build itself.