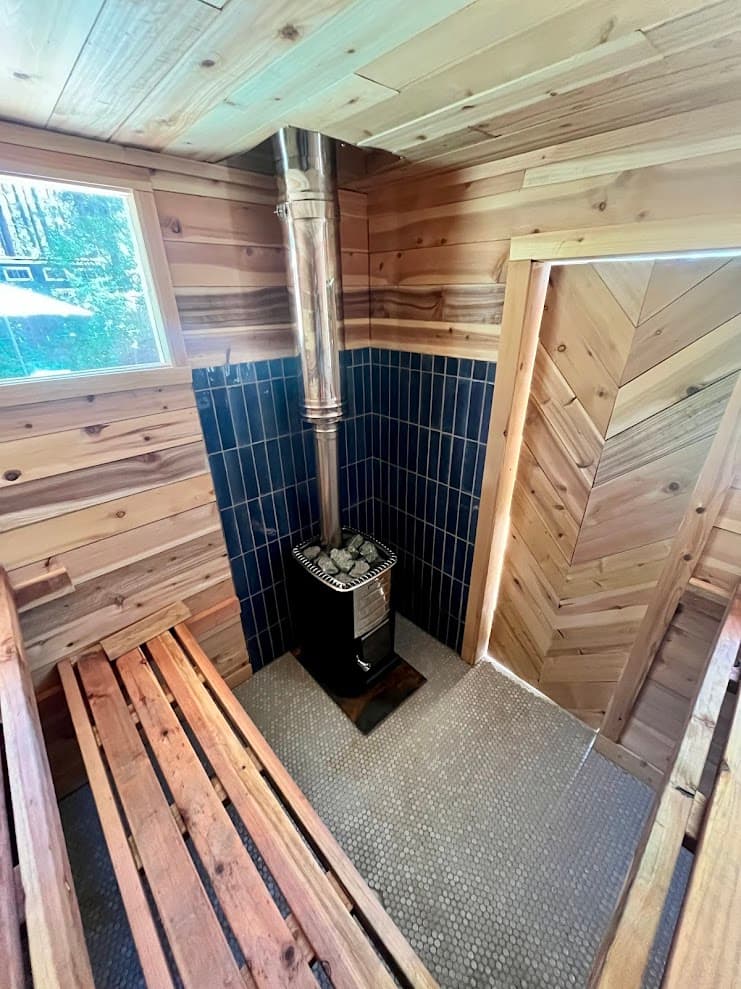
How to Design a Sauna: A Step-by-Step Planning Process Before You Build
Most people jump straight to picking a heater and a wood species. That's the fun part, so it makes sense. But the decisions that actually determine whether your sauna feels good — even heat, no cold feet, air you can breathe after 20 minutes — get made way earlier, on paper, before anything is bought or cut.
Learning how to design a sauna is really about getting the order of operations right. You decide the room, then the benches, then the heater, then the air. Skip a step or do them out of order and you end up compensating for a bad decision for the life of the build. Here's the process I actually use when I sit down to design one.
Start With How the Sauna Will Get Used
Before any dimensions, be honest about who's using it and how. A sauna for one person doing solo sessions with some stretching is a different room than one for a family of five, or a couple who want to lay down together, or a rental where a group piles in.
This matters because it drives size, and size drives everything downstream. A big portion of solo sessions involve stretching — on the floor, on the bench — so floor space you didn't think you'd use gets used constantly. Couples want a bench they can both lay flat on, which means at least 24 inches deep and 6 feet long per person. A household with mixed heat tolerance needs multiple bench tiers so the person who wants it blazing sits up top and the person who doesn't sits lower, same session.
Write down the real use case first. Everything else in how to design a sauna flows from that one honest answer.
Step 1: Size the Room
Our default recommendation is 8'x8'. It's an efficient use of materials, fits 4-6 people on the top bench, and lets two adults lay down. If that's too big for your space, here's the range we work in:
- Small (1-2 person): 4'x4' to 4'x6'
- Medium (3-4 person): 6'x6' to 6'x8'
- Large (4-6 person): 8'x8'
Don't go smaller than about 5'x5' if you can help it. Below that you get cold corners, uneven temperatures, and a cramped experience that people stop using after a year or two. The minimum that actually works well is closer to 6.5'x6.5'.
If you're converting an existing space — a garage, a spare corner, a bathroom — measure the ceiling first, not the floor. That's the constraint that usually kills a plan. More on that next.
Trusted by homeowners across Tahoe and beyond
Step 2: Get the Ceiling Height Right
This is the single most misunderstood part of how to design a sauna, and it's where a lot of home saunas quietly fail.
Aim for a 7.5 to 8 foot interior ceiling. Heat rises, so the hottest air sits near the top. The goal is to raise the benches enough that a seated bather's feet land at or above the midpoint of the heater stones. If the ceiling is too low, you can't raise the bench enough, your head bakes while your feet stay cold, and the whole thing feels off.
The catch: a 7.5-8 foot interior ceiling plus a pitched roof (which you want, to shed snow and rain) puts the exterior peak at 10 feet or more. That surprises almost everyone. So part of designing the sauna is designing the outside of the building too — does a 10-foot structure block a view from the house, crowd a small yard, or create a privacy issue with a neighbor?
If site constraints or looks matter more, you can drop to a 7-7.5 foot interior ceiling and an 8-9 foot exterior peak. The thermal experience is still good — you'll just get the occasional moment where your upper body feels warmer than your feet. In a small backyard, a lower, better-proportioned building is often the right call. Just insulate well to make up for it.
If you're converting a garage or bathroom, confirm the existing ceiling can actually hold 7.5-8 feet of finished interior sauna ceiling before you commit. And regardless of roof pitch, always frame a flat interior ceiling. A sloped interior ceiling wrecks even heat distribution and steam.
Step 3: Lay Out the Benches
Benches are where the "law of löyly" lives: the foot bench has to sit at or above the top of the heater stones. Get that wrong and no heater, wood, or ventilation choice will save you from cold feet.
Here's the geometry I design to:
- Upper bench top: 40-48 inches below the interior ceiling. That puts you in the hot zone where convective heat is evenly distributed — what's sometimes called the löyly cavity.
- Foot bench: 4-8 inches above the top of the heater stones. Non-negotiable for both comfort and hygiene (the foot bench needs to reach 55-70°C to keep bacteria and mold down).
- Bench spacing: each lower tier 16-20 inches below the one above it.
- Depth: 24 inches on upper benches (five 2x4s laid horizontally) so you can lay down; 16 inches is fine for lower benches or steps.
- Width per person: 18 inches minimum, 24-30 inches to be comfortable.
For layout, an L-shape is our go-to for 8x8 builds — benches along two adjacent walls, great for two people laying down, one on each leg of the L. A U-shape wraps three walls and suits larger rooms. A straight bench along the longest wall is the simplest and works in narrow spaces.
One thing to avoid: don't fully enclose the front face of the benches. Sweat drips through the slats to the floor, and if there's no access underneath, you can't clean it. Keep the design open, or make any panels removable.
If you want the full breakdown, our DIY sauna bench plans walk through construction, and the sauna size guide covers dimensions for every capacity.
Step 4: Size the Heater
Once the room volume is set, heater sizing is mostly math. The baseline rule is 1 kW per 45 cubic feet for a well-insulated, wood-lined room.
| Sauna Size | Cubic Footage | Recommended kW |
|---|---|---|
| 1-2 person (4x4x7) | ~112 cu ft | 2-4 kW |
| 2-3 person (5x6x7) | ~210 cu ft | 4-6 kW |
| 3-4 person (6x8x7) | ~336 cu ft | 6-8 kW |
| 4-6 person (8x10x7) | ~560 cu ft | 9-12 kW |
Adjust up for outdoor exposure, glass doors or windows, masonry walls, poor insulation, or cold climates. Adjust down for very well-insulated rooms or ceilings under 7 feet. When in doubt, size up slightly — a bit of extra kW compensates for slower heat-up and lets you run more stone mass.
Speaking of stones: more rock mass gives you softer, more even steam and smoother temperature swings. Most wall-mounted electric heaters only carry about 20 lbs of usable rock, so if you can run a model that holds more, do it. Use olivine diabase or peridotite only — never river rock or granite, which crack and shatter under heat cycling. Our sauna heater sizing guide goes deeper on matching a heater to your room, and sauna heater stones covers rock selection.
Most 6-9 kW heaters need a dedicated 240V, 40-50A circuit run by a licensed electrician. Plan that into your budget early — it's usually $500-2,000 on top of the heater.
Step 5: Design the Ventilation (Don't Skip This)
Ventilation is the part people treat as an afterthought and then wonder why the sauna feels stuffy and damp after two rounds. Bad ventilation is probably the number one problem in North American saunas. Steam added to stale air is just steam added to stale air — it isn't löyly.
The design that actually works for an electric sauna is mechanical downdraft:
- Fresh air supply above the heater — a 3-3.5 inch vent on the heater wall, about 12 inches above the top of the heater and 12 inches to the right of it. Incoming air gets pulled into the rising heat plume and distributed evenly instead of sinking cold across the floor.
- Mechanical exhaust below the foot bench on the opposite wall — a small inline duct fan pulls that mixed air down through the bench zone where people sit and breathe, and takes the stale, CO2-rich air out at the lowest point. Roughly 100-125 CFM for a 4-person room.
- Optional drying vent high on the exhaust wall, opened after the session to dry the room out and closed during use.
Keep the supply and exhaust on opposite walls so air actually crosses the room. Both on the same wall short-circuits the airflow.
If a powered fan isn't feasible, a basic three-hole passive setup (intake by the stove, exhaust below the top bench on the opposite wall, drying vent near the ceiling) is a big improvement over nothing. It costs you a little energy efficiency but the air quality and experience are worth it. The sauna ventilation guide has the full layout.
Step 6: Insulation, Vapor Barrier, and Finishes
With the functional stuff locked, fill in the envelope. Insulate walls to R-13 to R-21 (more in cold climates), ceilings to R-30 or better since heat rises. Over the insulation goes a foil vapor barrier on the warm side, seams overlapped and taped, then quarter-inch furring strips to create an air gap, then your interior paneling.
For wood, western red cedar is the standard — moisture resistant and it looks the part. Hemlock and aspen are lighter and cheaper. If you want to save real money, cedar fence pickets shiplapped on a table saw work fine and cut paneling cost dramatically, at the price of a slightly more rustic look.
Windows and doors are trade-offs. Glass loses far more heat than an insulated wall, so limit it to what you actually need for a view. Keep the door small — 24 inches wide — because opening the door is the biggest single heat-loss event in a session, and it opens a lot when people come and go for cold plunges and breaks.
Step 7: Put It on Paper as a Real Plan Set
The last step is turning all of this into an actual plan — dimensioned drawings, a bench layout, a heater spec, vent locations, an electrical plan. This is what separates a sauna that works from a pile of guesses. Vague plans are where builds go sideways: the electrician runs the wrong circuit, the benches end up too low, the vents land in the wrong spot.
A real plan set is also what your contractor needs. If you're handing this to a builder, they can't price or build from "I want an 8x8 sauna." They need the specs. That's the whole idea behind a proper sauna design plan set — it gives everyone the same drawing to build from.
When to Design It Yourself vs. Hire Help
If you're a hands-on builder and you've read through the numbers above, you can absolutely design a small sauna yourself. Start with our free sauna design checklist and work through each decision in order.
Where people bring us in is when the site is tricky, the budget is real, or they just don't want to gamble on getting stratification and ventilation right the first time. We do this remotely for clients all over the country — you send measurements and photos, we send back a design and a plan set your contractor can build from. That's the core of our remote sauna design service. Getting the design right on paper costs a fraction of fixing a built sauna that doesn't heat evenly.
Frequently Asked Questions
What's the first step in designing a sauna?
Decide how the sauna will be used and by how many people. That drives the room size, and room size drives ceiling height, bench layout, and heater sizing. Everything else in the design follows from that first honest answer.
What is the ideal ceiling height for a sauna?
A 7.5 to 8 foot interior ceiling is ideal because it lets you raise the benches high enough to get bathers' feet at or above the heater stones. You can drop to 7-7.5 feet for a lower-profile building, but you'll get occasional warm-head, cool-feet moments. Always frame a flat interior ceiling regardless of the roof pitch.
How do I size a sauna heater?
Use roughly 1 kW of heater per 45 cubic feet of room volume for a well-insulated, wood-lined sauna. A 6x8 room needs about 6-8 kW. Adjust up for glass, outdoor exposure, or poor insulation, and plan for a dedicated 240V circuit installed by a licensed electrician.
Can I design a sauna myself, or should I hire someone?
If you're comfortable with the numbers and building a small, simple sauna, you can design it yourself using a checklist. Hire help when the site is constrained, the budget is significant, or you want to be sure the harder details — bench height, stratification, ventilation — are right the first time. Fixing a badly designed sauna after it's built costs far more than designing it properly upfront.
What ruins a sauna design most often?
Two things: benches set too low relative to the heater (which causes cold feet), and bad or missing ventilation (which makes the air stale and the steam weak). Both are design decisions made before construction, which is exactly why the planning process matters so much.
Next Steps
If you're ready to plan your build, download the free sauna design checklist and work through each decision in the order above. If you'd rather have a design and a contractor-ready plan set done for you, take a look at our remote sauna design service — we work with clients anywhere in the country. Get the design right on paper and the build takes care of itself.