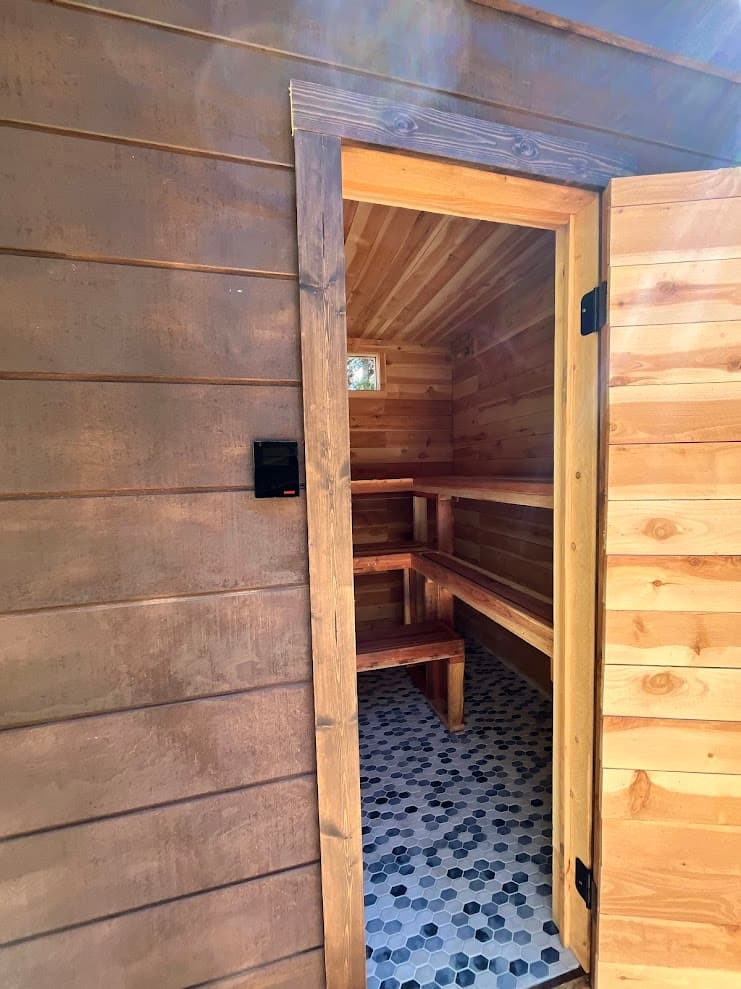
Sauna Wood Treatment: What to Put on the Wood, and What Will Ruin It
Sauna wood treatment is one of those topics where the internet gives you confidently wrong advice in both directions. Half the results tell you to seal everything. The other half sell you a bottle of oil for every surface. The actual answer depends on which surface you're talking about, and for most of the interior the right treatment is nothing at all.
Here's the short version: leave the interior walls and ceiling bare, consider paraffin oil on benches if you want to, and put real effort into protecting the exterior of an outdoor sauna. Everything else is either unnecessary or actively harmful.
Why You Don't Seal the Inside of a Sauna
Standard wood finishes — polyurethane, varnish, lacquer, deck sealer, stain — all work the same basic way. They form a film on the surface that keeps water out.
That's exactly the wrong behavior in a sauna.
A sauna interior goes through a brutal cycle. It heats to 170–200°F, absorbs a large amount of moisture from löyly and sweat, then cools and dries out. That happens every session, hundreds of times over the life of the room. Wood needs to breathe through that cycle — take on moisture, release it, move a little. A film finish traps moisture underneath, and the trapped moisture plus the heat cycling makes the film crack, cloud, peel, and eventually let go in sheets. Underneath, you get wood that's held wet against a plastic membrane, which is how you grow mold in a place that should be self-sterilizing.
There's a second problem: offgassing. Most film finishes are not rated for 200°F. At sauna temperatures they release solvents, and you're sitting in a small sealed room breathing whatever comes off. This is the same reason we recommend solid wood slab doors over pre-hung doors — pre-hung doors carry paints and glues that offgas at temperature.
And a third, more practical one: a sealed bench gets slippery when wet, and a sealed surface feels different against bare skin at 190°F. Film finishes conduct heat differently than raw wood. It's noticeable and it isn't pleasant.
So: no polyurethane, no varnish, no lacquer, no shellac, no deck sealer, no exterior stain, nowhere on the interior. This isn't a preference. It's the single most common way people ruin a new sauna.
Interior Walls and Ceiling: Leave Them Alone
Bare cedar, hemlock, aspen, or spruce on the interior needs no treatment. None.
The wood species we use are chosen partly because they don't need it. Western red cedar is naturally moisture and decay resistant. Aspen and hemlock have minimal resin and hold up fine. Properly installed over a vapor barrier and an air gap, with real ventilation, interior paneling lasts decades untreated.
What actually protects interior wood is the assembly and the airflow, not a coating:
- Vapor barrier — aluminum foil sheeting on the warm side of the insulation, seams overlapped six inches and sealed with aluminum tape. This is what keeps sauna moisture out of the wall cavity.
- Air gap — quarter- to half-inch furring strips between the vapor barrier and the paneling, so the back face of the boards can dry.
- Ventilation with post-session drying — a drying vent high on the wall, opened after a session, pulls residual moisture out. This does more for wood longevity than any product you can buy.
If your walls are darkening or spotting, the problem is ventilation, not a missing finish. Adding oil won't fix it. See our post on preventing mold in a sauna for the actual causes.
One note on installation that affects longevity: if you're using shiplap, install it horizontally with the male edge down and the female edge up, so water can't pool in the joint. Same principle applies to tongue and groove — orientation matters more than any coating. We cover it in detail in our sauna tongue and groove installation guide.
Trusted by homeowners across Tahoe and beyond
Benches: Paraffin Oil, Maybe
Benches are the one interior surface where a treatment is defensible, because benches take direct sweat contact for hours.
The product people use is paraffin oil — sold as sauna wood oil, sauna wood treatment, or sauna sealant depending on the brand. It's a food-grade mineral oil that penetrates into the wood rather than forming a film on top. That distinction is everything. It doesn't trap moisture, doesn't crack, doesn't offgas at temperature, and doesn't change how the surface feels against skin.
What it does: makes the wood shed sweat rather than absorb it, keeps the bench looking newer longer, and makes cleaning easier.
Application is straightforward. Sand lightly with 150–220 grit to open the pores and knock down any raised grain. Vacuum and wipe the dust off. Apply a thin, even coat with a clean lint-free cloth, working with the grain. Let it soak in for 15–20 minutes, then wipe off everything that hasn't absorbed — leaving excess on the surface is how you end up with a sticky bench. Let it cure a full 24 hours before firing the sauna. Reapply once or twice a year, or whenever water stops beading and starts soaking in.
Is it necessary? No. Plenty of well-built saunas run untreated benches for years and just sand them lightly once a season. Traditional Finnish practice often skips oil entirely and relies on sitting on a towel or a bench cover, which is the actually effective solution to sweat contact. Oil is a convenience, not a requirement.
What not to use on benches: linseed oil (goes rancid and gets sticky), tung oil (cures to a film), teak oil and Danish oil (both contain varnish resins that form a film), and any cooking oil (goes rancid, smells, attracts bacteria). If a product cures hard, it's wrong for a sauna bench.
The Exterior Is Where Treatment Actually Matters
Here's the inversion that surprises people: the outside of an outdoor sauna needs real protection, and the inside needs none.
The exterior faces sun, rain, snow, and freeze-thaw with none of the benefit of a controlled interior environment. Around Tahoe that means UV at altitude, heavy snow load against the lower siding, and months of moisture. Untreated cedar siding will silver out and stay structurally fine for a long time — cedar is genuinely durable — but if you want it to keep its color or you're using a less rot-resistant species, it needs a finish.
Options, roughly in order of how much maintenance they demand:
- Nothing. Cedar weathers to gray and holds up. Zero maintenance, and honestly a fine choice if you like the look.
- Penetrating oil finish or semi-transparent stain. Preserves color, lets the wood breathe, needs recoating every 2–4 years depending on exposure. This is what we recommend most often.
- Solid stain or paint. Longest color retention, but it's a film — it will eventually peel on a south-facing wall, and prep for recoating is real work.
- Thermally modified wood. Not a finish, but worth mentioning: heat-treated wood is dimensionally stable and rot resistant without any coating. Higher up-front cost, much lower maintenance. More on it in our thermally modified wood overview.
The detail people miss: seal the exterior around windows and doors with high-temperature silicone from the outside only. Never apply sealant to the interior side of a window frame — it offgasses at sauna temperatures. Same rule as everything else on the inside.
Pay particular attention to the bottom 18 inches of siding in snow country. That's where snow piles against the wall and stays wet for months, and it's where rot starts.
Cleaning Is the Real Maintenance
If you only do one thing for the wood, make it cleaning and drying, not coating.
Wipe the benches down after use — plain water and a cloth is enough for routine cleaning. For a deeper clean a few times a year, mild soap and water, or a diluted vinegar solution for stubborn spots. Rinse and let it dry fully.
Never use bleach, ammonia, or harsh chemical cleaners on sauna wood. They break down the fibers, strip the natural oils out of cedar, and leave residue that vaporizes when the room heats up.
For stains that have set into the wood — and sweat stains will eventually — light sanding is the answer. A pass with 150 grit takes the top layer off and the bench looks new again. This is one of the advantages of untreated wood: you can always sand back to fresh surface. You can't do that through a film finish without stripping it first. Our how to clean a sauna post covers the full routine.
The other half of maintenance is drying. Open the drying vent after every session and let the room clear. A sauna that dries out fully between uses doesn't grow mold and doesn't degrade the wood, regardless of what's on the surface.
What About the Floor?
Sauna floors should be tile, concrete, or sealed appropriately for their material — not raw wood taking standing water. If you have a wood floor, it needs to slope toward a drain or at minimum dry completely between sessions.
Duckboards or removable slatted platforms over a tile floor are a good arrangement: they keep feet off cold tile, they come out for cleaning, and they dry fast. Treat them the same as benches — bare or lightly oiled, never sealed.
Frequently Asked Questions
Should I seal the wood in my sauna?
No, not with a film-forming sealer. Polyurethane, varnish, lacquer, and deck sealers all trap moisture, crack under heat cycling, and offgas at sauna temperatures. Interior sauna wood should be left bare, or at most treated with a penetrating paraffin oil on benches.
What oil is safe for sauna benches?
Paraffin oil sold specifically as sauna wood oil is the standard. It's food-grade mineral oil that penetrates rather than films. Avoid linseed oil, tung oil, teak oil, Danish oil, and any cooking oil — they either cure to a film or go rancid.
How often should I treat sauna benches?
Once or twice a year for a regularly used home sauna, or whenever water stops beading and starts absorbing into the surface. If you use a bench cover or sit on a towel, you'll go much longer between treatments.
Do I need to treat cedar in a sauna?
No. Western red cedar is naturally moisture and decay resistant and performs well untreated for decades on the interior, assuming there's a proper vapor barrier, an air gap behind the paneling, and working ventilation. Exterior cedar siding on an outdoor sauna is a different question — that benefits from a penetrating stain or oil.
Can I use a deck sealer inside my sauna?
No. Deck sealers form a surface film and are not rated for 200°F. They'll crack and peel, trap moisture underneath, and offgas into the room. Deck products belong on the exterior of an outdoor sauna only, and even then a semi-transparent penetrating stain is usually the better choice.
Bottom Line
The interior of a well-built sauna doesn't need a product. It needs a vapor barrier, an air gap, cedar or another appropriate species, and ventilation that dries the room out after every session. Skip all of that and no finish will save you. Get it right and bare wood lasts decades.
If you're planning a build and want the wall assembly, ventilation, and material specs worked out properly, that's what we do — see remote sauna design for how it works, or check the wood species comparison if you're still deciding what to panel with. If you already own a sauna and want the maintenance routine in one place, the free Sauna Owner's Guide covers use and upkeep.