Building a Sauna in the Northeast — Basements, Cold Winters, and What to Get Right
The Northeast has a natural connection to sauna culture that most people don't think about. Maine, Vermont, New Hampshire, and parts of Massachusetts and Connecticut have significant Finnish and Scandinavian heritage communities. Add in the long, cold winters and the general appetite for anything that makes January bearable, and there's real demand for home saunas across the region.
But building a sauna in a 1920s Colonial in Connecticut is a different project than building one on raw land in Montana. The Northeast brings its own set of challenges: basements with moisture issues, older homes with limited electrical capacity, freeze-thaw cycles that punish outdoor structures, and building codes that vary dramatically from town to town.
This guide covers the Northeast-specific considerations for planning and building a sauna, whether you're converting a basement corner, adding an outdoor structure, or fitting a sauna into an existing space.
Basement Saunas: The Northeast Sweet Spot
More saunas get built in Northeast basements than probably any other location type in the country. It makes sense — most homes in the region have full basements, and that's a lot of underused square footage.
A basement sauna conversion is one of the most practical builds. You already have four walls (or at least the perimeter), a concrete floor, proximity to electrical panels, and often access to plumbing for a nearby shower. The typical conversion involves framing out a room within the basement, insulating the walls and ceiling, installing a vapor barrier, and running a dedicated electrical circuit for the heater.
The main challenge in Northeast basements is moisture. Not sauna moisture — ambient basement moisture. Many homes in the region have basements that are damp, especially in spring when snowmelt raises the water table. Before you build a sauna in a basement, address any water intrusion issues first. That means:
- Fix any active leaks or seepage. French drains, exterior waterproofing, or interior drainage systems need to be in place before you insulate.
- Check the humidity levels. Run a hygrometer in the basement for a week. If the relative humidity consistently sits above 60%, you need a dehumidifier running before and after sauna sessions.
- Don't build directly against a foundation wall that sweats. Leave a gap or use a dimple membrane between the foundation wall and your sauna framing. This gives moisture a path to drain rather than getting trapped in your wall assembly.
If your basement is dry and well-maintained, it's an excellent location. The concrete floor is ideal for a sauna — it's fireproof, easy to clean, and handles water well. Add tile or a concrete sealer for a finished look, and you've got a floor that will last forever. See our sauna floor options guide for more detail on materials.
For the full process of framing, insulating, and finishing a basement sauna, our basement sauna guide walks through every step.
Outdoor Saunas and the Freeze-Thaw Cycle
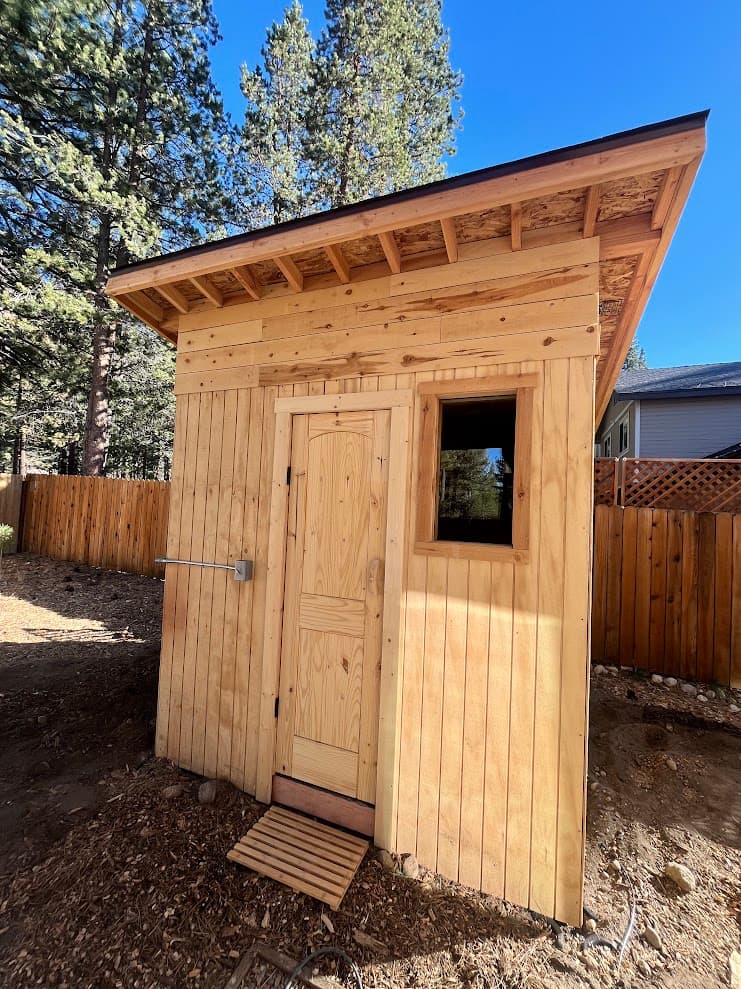
Outdoor saunas are popular throughout the Northeast, especially on rural properties in New England and upstate New York where there's land to work with. The cold winters are actually an advantage here — stepping out of a 180-degree sauna into 10-degree air is the authentic experience that people in warm climates can't replicate.
But the Northeast freeze-thaw cycle is brutal on structures. Water gets into cracks, freezes, expands, and gradually breaks things apart. Designing an outdoor sauna to withstand this means paying attention to details that don't matter in milder climates.
Foundation: The foundation must extend below the frost line, which ranges from 36 inches in southern Connecticut to 60+ inches in northern Maine and Vermont. Concrete sono-tubes or helical piers are the most common approach. A floating gravel pad works for smaller structures but needs proper drainage to prevent frost heaving. Don't skip this — a sauna that shifts 2 inches from frost heave will crack its door frame and lose its seal.
Roofing: Design for snow loads. Northeast snow loads range from 30 psf in coastal Connecticut to 70+ psf in the Vermont and New Hampshire mountains. A simple shed roof or gable roof with a steep pitch (6:12 or steeper) sheds snow naturally and avoids dangerous accumulation. If your sauna is in a drift zone (downwind of a larger structure or tree line), size the roof structure for ground snow load plus drift loading.
Exterior materials: Use materials that handle moisture cycling without degrading. Thermally modified wood is excellent for Northeast exteriors — it's dimensionally stable through temperature and moisture swings. Standard cedar works too but needs maintenance. Avoid untreated pine or spruce on exterior surfaces; they won't last more than a few years without constant refinishing.
Plumbing and water lines: If you're running water to an outdoor sauna (for a shower or cleaning), the supply line must be insulated and heat-traced or designed to drain completely after each use. A frozen supply line in January will crack, and you won't discover it until the thaw. Many Northeast outdoor sauna owners skip plumbing entirely and use a bucket-and-ladle approach for loyly water, with cooling done via a nearby snow bank or cold plunge.
Trusted by homeowners across Tahoe and beyond
Electrical Considerations in Older Homes
This is where a lot of Northeast sauna projects hit a wall — literally. Homes built before 1970 often have 100-amp or even 60-amp electrical panels. A standard electric sauna heater draws 30-50 amps on a 240V circuit. In a house with a 100-amp panel that's already running central air, an electric range, and a dryer, there may not be enough capacity for a sauna heater without a panel upgrade.
Before you commit to an electric sauna, have an electrician evaluate your panel capacity. The options are:
- Panel upgrade: Going from 100A to 200A costs $1,500-$3,000 depending on your utility and the complexity of the work. This is often worth doing regardless of the sauna — it adds capacity for future needs and can be a selling point when you eventually sell the home.
- Sub-panel: If the main panel has capacity but the sauna is far from the panel (a detached garage, a backyard structure), a sub-panel near the sauna simplifies the wiring and keeps voltage drop within acceptable limits.
- Wood-burning heater: If the electrical situation is genuinely prohibitive, a wood-burning sauna stove eliminates the electrical requirement entirely. Many Northeast sauna owners prefer wood-burning anyway — it's part of the ritual, and firewood is readily available throughout the region.
See our full sauna electrical requirements guide for circuit sizing, wire gauge, and code requirements.
Insulation: You Probably Already Know This Part
Northeast homeowners are generally insulation-literate. You live in a region where heating bills matter, and most people have opinions about R-values.
For a sauna, the insulation requirements are straightforward:
- Walls: R-13 minimum (standard 2x4 framing with fiberglass or mineral wool batts). R-19 in 2x6 walls for outdoor structures.
- Ceiling: R-19 to R-30. Heat rises, so the ceiling is where you lose the most energy. In an outdoor structure in northern New England, go with R-30.
- Floor: R-10 to R-13 if the sauna is over an unheated space (like a crawlspace). If it's on a concrete slab, rigid foam under the slab or on top with a finish floor works.
The vapor barrier goes on the warm side — the sauna interior. Use foil-faced kraft paper or a foil vapor barrier designed for sauna use. This reflects radiant heat back into the room and prevents moisture from migrating into the wall cavity. Our sauna insulation guide covers the full assembly in detail.
One Northeast-specific note: if your sauna is in a basement against a foundation wall, don't use faced insulation against the concrete. Use unfaced mineral wool or rigid foam, then add the sauna vapor barrier on the interior face. This prevents trapping moisture between two vapor barriers — a common mistake in basement renovations that leads to hidden mold.
Historic Homes and Building Code Challenges
The Northeast has some of the oldest housing stock in the country, and many towns have historic preservation commissions that regulate exterior modifications. If you're building an outdoor sauna on a property in a historic district, you may need approval from the historic commission in addition to standard building permits.
This doesn't mean you can't build — it usually means the exterior design needs to be sympathetic to the existing architecture. A modern-looking barrel sauna might get pushback in a historic New England village, while a shed-style sauna with traditional clapboard siding and a gable roof typically gets approved without issue.
Building codes also vary significantly across Northeast municipalities. Some key things to check with your local building department:
- Setback requirements. How far must the sauna be from property lines, the main structure, and any septic system components? In dense Northeast neighborhoods, setbacks can be the limiting factor.
- Structure size limits. Many towns allow accessory structures under 120-200 square feet without a building permit, but require electrical permits regardless of size.
- Fire separation. If the sauna is attached to the house or within 10 feet of it, fire separation requirements may apply — especially with a wood-burning heater.
Check our general sauna permit guide for the framework, then verify the specifics with your town.
The Best Time to Build in the Northeast
Timing your build matters more in the Northeast than in most regions. The ideal window for outdoor construction is May through October. Foundation work needs to happen before the ground freezes (November in most areas). Pouring concrete below 40 degrees requires cold-weather precautions that add cost and complexity.
Interior builds (basement conversions, bathroom conversions, garage saunas) can happen year-round since they're protected from weather. If you're planning an indoor sauna, winter is actually a great time to schedule a contractor — they're less busy, lead times are shorter, and you'll have the sauna ready for the next heating season.
For any sauna build, the planning and design phase should happen 2-3 months before construction starts. Getting a proper design package created, sourcing materials, and lining up a contractor all take time. If you want an outdoor sauna operational by November, start the design process no later than June.
Finding a Sauna Builder in the Northeast
The Northeast has more sauna-aware contractors than the Southeast or Southwest, but dedicated sauna builders are still uncommon outside of Finnish heritage communities in northern New England. In most metro areas — Boston, New York, Philadelphia, Hartford — you're looking at a general contractor or finish carpenter who's willing to take on a specialized project.
The challenge isn't finding someone who can frame a room and hang cladding. It's making sure the sauna-specific details get done right: vapor barrier placement, vent sizing, heater clearances, bench ergonomics, and the electrical work. These details aren't intuitive for a contractor who hasn't built a sauna before, and they're exactly the details that make the difference between a sauna that feels great and one that feels stuffy.
This is where remote sauna design comes in. We create detailed construction documents — dimensioned drawings, materials lists, heater specs, ventilation placement, and step-by-step construction sequencing — that give your contractor everything they need. Your builder doesn't need sauna experience; they need good plans. We design saunas for clients throughout the Northeast and deliver plans that work for the region's climate and construction style.
If you're in the early planning stage, what does a sauna designer do explains the process, and sauna design for contractors shows exactly what your builder will receive.
Frequently Asked Questions
Can you put a sauna in a basement with moisture issues?
Only if you fix the moisture issues first. Seal any active leaks, install drainage if needed, and get the relative humidity below 60% consistently. Once the basement is dry, it's one of the best locations for a sauna — concrete floors handle water well, and you're already below grade where temperature is naturally stable. But building a sauna over a wet basement is a recipe for mold.
How deep does the foundation need to be for an outdoor sauna in the Northeast?
Below the frost line, which varies from 36 inches in southern Connecticut and New Jersey to 60+ inches in northern Vermont, New Hampshire, and Maine. Check your local building code for the exact frost depth. Sono-tube footings or helical piers are the most common foundation types for outdoor saunas in the region.
Is a wood-burning or electric sauna heater better for the Northeast?
Both work well. Electric is more convenient and requires less ongoing effort. Wood-burning is more traditional, doesn't require a dedicated high-amperage electrical circuit (important in older homes with small panels), and gives you a more authentic experience. If your home has a 200-amp panel with available capacity, electric is straightforward. If you have a 100-amp panel and don't want to pay for an upgrade, wood-burning solves the problem entirely.
How much does it cost to build a sauna in the Northeast?
Similar to national averages. A basement conversion typically runs $3,000-$10,000 depending on size, materials, and whether you hire a contractor or DIY. A custom outdoor build runs $8,000-$25,000+. Panel upgrades ($1,500-$3,000) and frost-depth foundations (add $1,000-$2,000 vs. a simple gravel pad) are the main Northeast-specific cost adders. See our full cost breakdown guide for line-item details.
Do I need a permit to build a sauna in my basement?
Typically you need an electrical permit for the heater circuit, even if the overall construction is exempt from a building permit. Many Northeast towns also require a building permit for any finished space in a basement, even if it's not adding square footage. HOA and historic district requirements may add another layer. Check with your local building department before starting work.