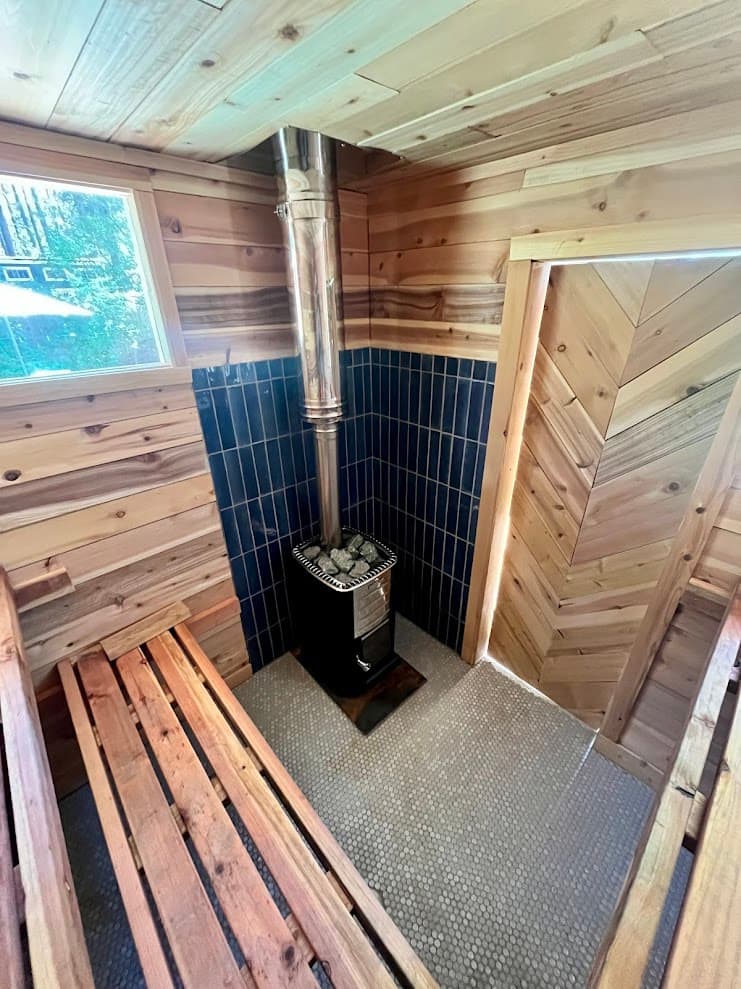
How to Break In a New Sauna Heater: Burn-Off Cycles, Smells, and the First Real Session
You finished the build, flipped the breaker, and the first thing you noticed is a smell. Warm dust, hot metal, maybe something a little chemical. That's normal, and it's the reason you should break in a new sauna heater before you sit in the room for a real session.
Breaking in a heater isn't complicated. It's a few empty heat cycles with the vents open and the door cracked. The details below are what we walk clients through on every new build, and why each step matters.
Why a new sauna heater smells
Every new heater comes out of a factory with something on it. Electric heaters have a thin film of machining or protective oil on the elements and the casing. Wood-burning stoves have high-temperature paint that needs to cure. The wood around the heater is fresh, so it still holds some moisture and resin. And if you added new stones, they carry dust from the quarry and the shipping bag.
None of this is dangerous in the amounts involved, but you don't want to breathe it while you're sweating at 180°F with your lungs working hard. So you cook it off first, with nobody in the room.
The smell usually fades over the first two or three heat cycles. If it's still strong after that, something else is going on, and we cover that further down.
What you need before the first fire
A few things to check before you turn anything on. They take ten minutes and they catch most first-day problems.
First, confirm the stones are loaded correctly. Use olivine diabase or peridotite, 2-6 inches across, packed loosely with the flat side up and tilted slightly toward the center so air can move between them. Don't use river rock, granite, or landscape stones. They can crack or shatter when they heat, and some carry oils or organic material that will stink for years. Our sauna heater stones guide covers what to buy and how much.
Second, make sure the room is clear. No towels, buckets, tools, or packaging near the heater. Check your heater clearances one more time against the manual, because a heater that's too close to a wall or bench will show it the first time it runs hot.
Third, open both vents fully. The intake and the exhaust both need to be open for the first cycle so the fumes have somewhere to go. If you haven't built the vents yet, stop and read our sauna ventilation guide before you heat anything.
Last, read the heater manual for any manufacturer-specific break-in steps. Some brands call for a specific number of cycles or a specific temperature. Where the manual and this post disagree, follow the manual.
Trusted by homeowners across Tahoe and beyond
The three-cycle break-in we recommend
Here's the routine we use. It's built around three empty heat cycles before anyone uses the room.
Cycle one: vents open, door cracked
Turn the heater on and bring the room up to around 150°F. Leave the vents fully open and prop the door open a few inches for the first ten minutes or so to let the initial smell out. Then close the door and hold 150°F for about an hour.
Stay close by for this one. You're listening for ticking or popping (that's wood and metal expanding, normal), and you're smelling for anything sharp. A hot-dust smell is expected. Burning plastic or an electrical smell is not. If you get that, shut the heater off at the breaker and check for a wire or a piece of packaging you missed.
Then let the room cool completely. Don't speed it up by flinging the door open on a cold day. Let it come down on its own.
Cycle two: closed up, same temperature
Same routine, 150°F for an hour, vents still open. The smell should be noticeably lighter. This cycle does most of the work on the wood. The fresh lumber is still driving out moisture, and the heat cures the stones and settles the room.
If you built the room with a vapor barrier and good insulation, the moisture mostly leaves through the vents and the first few days of use. Our sauna insulation guide explains why that layer matters and how to keep it intact.
Cycle three: a little hotter
Run the third cycle the same way, and if the smell is gone, push it toward 170°F for the last 15 minutes or so. This gives you a feel for how the room actually behaves at working temperature, which is the first real test of your build.
Pay attention to how long it takes to get there. If you're way off from what the heater should do in a room your size, that's useful information. We cover typical times in our post on how long a sauna takes to heat up.
Wood-burning stoves: curing the paint
If you installed a wood-fired stove instead of an electric heater, the break-in has an extra step. Most stoves ship with high-temperature paint that isn't fully cured until it's been through a few real heat cycles. During the first fires it will smoke and smell, and it may look slightly different afterward.
The approach is to start small. Build a modest fire, hold it for a while, let it die down and cool, and repeat with a slightly bigger fire. Don't go straight to a full-power burn on day one. Rapid heating on an uncured stove can cause paint to blister, and in a few cases can stress the metal or the stones.
Keep the room well ventilated the whole time, and make sure your chimney draws properly before you commit to a long burn. If you're still working out the flue, our sauna chimney installation guide covers clearances and draft.
After the cycles: inspect the room
Once you've done three cycles and the room has cooled, go through it with your hands and eyes. This is the step people skip, and it's the one that saves you from a hot screw head on your back.
Check for loose nails and protruding screw heads. Wood shrinks as it dries, and fasteners that were flush on day one can stand proud after a few heat cycles. Look at the benches in particular. All bench fasteners should be driven from underneath, never through the sitting surface, but check anyway. Sand any rough spots or splinters, especially on bench edges where bare skin touches.
Then look at the stones. Some will have shifted. Restack anything that has dropped into a gap and make sure the stones are still loose enough for air to flow through. If you see a cracked stone, replace it now.
Finally, look at the wood around the heater. Some darkening near the stove is normal. Charring or scorching is not, and it means your clearances are off.
Your first real session
After the third cycle, you're ready. Here's how we suggest starting.
Heat the room to 160-170°F. That's a moderate starting point, and you can work up toward 180-200°F as you get used to it. Keep the first few sessions to 15-20 minutes, and drink water before and after.
Keep a bucket of water and a ladle nearby if you want steam. Start with small amounts on the stones. A little water goes a long way, and you can always add more. If you want the full explanation of why this works, read our löyly explained page.
If you want more on how hot is hot, our post on sauna temperature walks through ranges and what they feel like.
When the smell doesn't go away
Three heat cycles should clear the factory smell. If it's still strong after that, here are the usual causes.
The first suspect is the stones. Non-sauna rock, or stones that picked up oils or organic material before they were loaded, can smell for a very long time. If you used anything other than proper sauna stones, replace them.
The second is a finish on the wood. If someone stained, sealed, or oiled the interior, it will cook and smell, and some products will give off fumes you don't want to breathe. Interior sauna wood should generally be left raw. See our post on what to put on sauna wood for what's safe.
The third is a musty or sour smell rather than a hot smell. That points to moisture, usually poor ventilation or a vapor barrier problem, and it can turn into mold if you ignore it. Our guide to preventing mold in a sauna covers the fixes.
And if the smell is a true electrical or burning-plastic smell, shut it off and have the wiring checked before you use it again.
A short checklist
Before cycle one: stones loaded loosely, room cleared, clearances checked, both vents open, manual read.
During the cycles: 150°F for an hour, door cracked for the first ten minutes, cool completely between cycles, stay nearby.
After: check fasteners, sand rough spots, restack stones, look for scorching near the heater.
First session: 160-170°F, 15-20 minutes, water close by.
Next steps
If you're still planning the build, most of what makes a first firing go smoothly is decided earlier: vent placement, heater clearances, and stone choice. We cover all of that in our remote sauna design service, where we work out the details for your specific room before you buy a single board. You can also start with the sauna design checklist if you want to work through it yourself.
Frequently Asked Questions
How long should I run a new sauna heater before using it?
We recommend three empty heat cycles, each at around 150°F for about an hour with the vents open, and a full cool-down between them. Some manufacturers specify their own break-in, so check your manual first.
Is the smell from a new sauna heater harmful?
In the small amounts involved it's usually just manufacturing oil and fresh paint or wood burning off, but you don't want to breathe it during a session. That's why the burn-off is done with the room empty and the vents open. A strong electrical or burning-plastic smell is different, and means you should shut the heater off and check the wiring.
Do I need to break in a wood-burning sauna stove differently?
Yes. High-temperature stove paint cures over the first few fires, so start with small fires and build up gradually instead of going straight to a full burn. Keep the room ventilated and confirm your chimney draws well first.
Why does my new sauna still smell after the break-in?
Usually it's the stones, a finish on the wood, or moisture. Non-sauna rock and sealed or stained interior wood are the most common culprits, and a musty smell points to a ventilation or vapor barrier problem rather than a heater problem.